| |
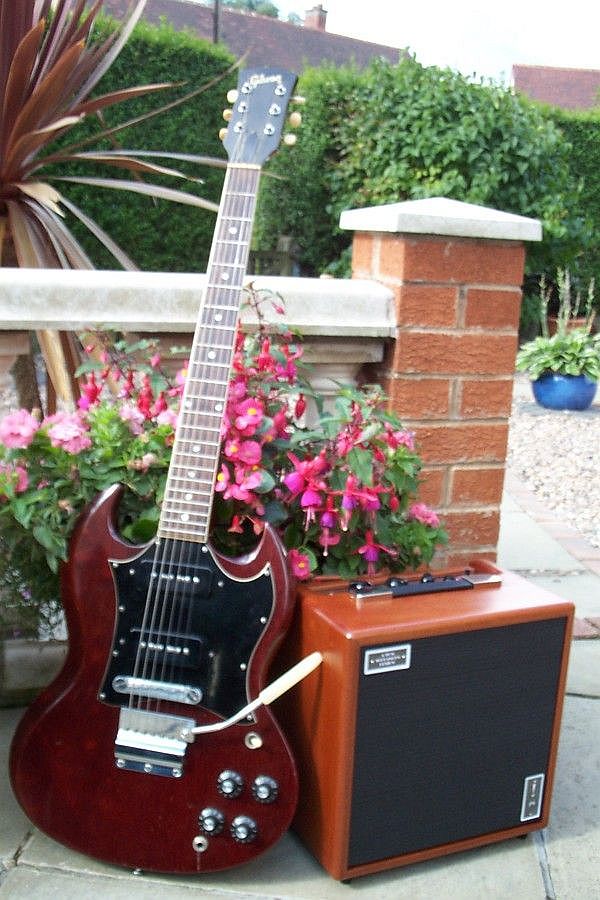 |
"A perfect pair"
Gibson SG and Octal Mojo amp
The result of several weeks correspondence to determine a solution to playing guitar at home,
at a volume level designed to be S.O. and neighbour friendly. Yet still allow playing at overdrive
levels. A job it does admirably.
|
 |
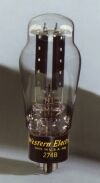
An amp for the distiguishing artist:
1 Watt of parallel single ended triode power
is enough for everyone - when done right.
1 Watt?
 You dont believe us? Well neither did I. Suffice to say that, when playing a few
George Thorogood riffs, rather badly, on slide guitar at full bore, the neighbours
immediately showed their appreciation by banging on the walls.
You dont believe us? Well neither did I. Suffice to say that, when playing a few
George Thorogood riffs, rather badly, on slide guitar at full bore, the neighbours
immediately showed their appreciation by banging on the walls.
|
 |
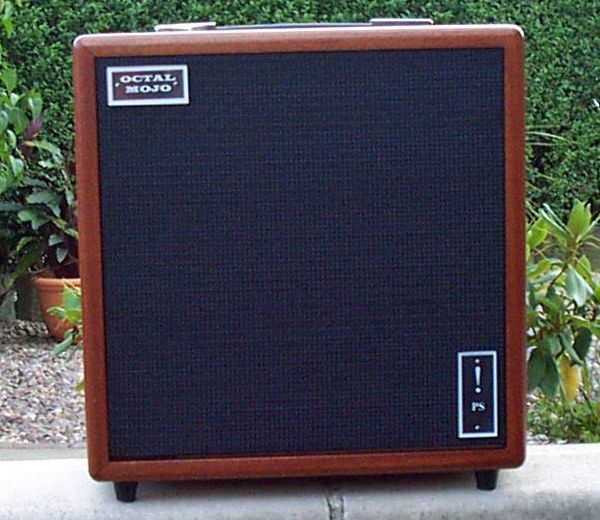
Real MoJo needs Real Wood
(any luthier will confirm)
Tolex only is a cheap excuse to cover even cheaper particle board.
No cheapness here, but solid wood and exact craftsmanship.
|
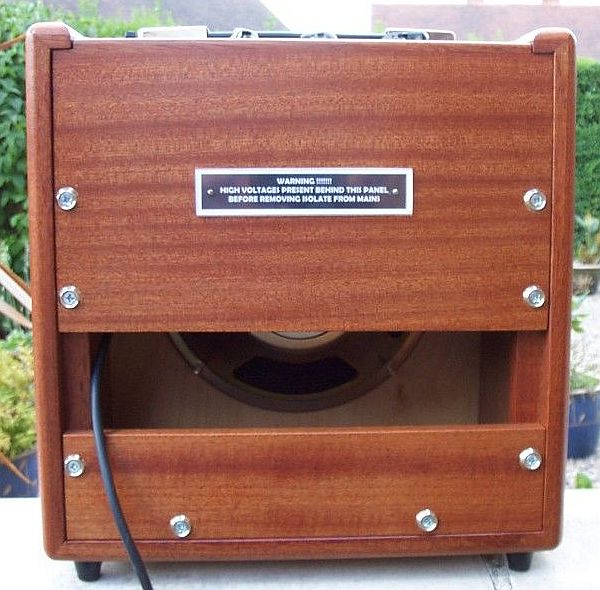 |
A view at the backside
Ergonomics rather than design.
A disproportionately wide top panel to protect the tubes, enough gap to allow
the mains cable to be retrieved, and a small bottom panel to stop, said mains
cable and stored guitar lead from falling out. Also of course, the obligatory
reminder that there are lethal voltages present behind the panel.
|
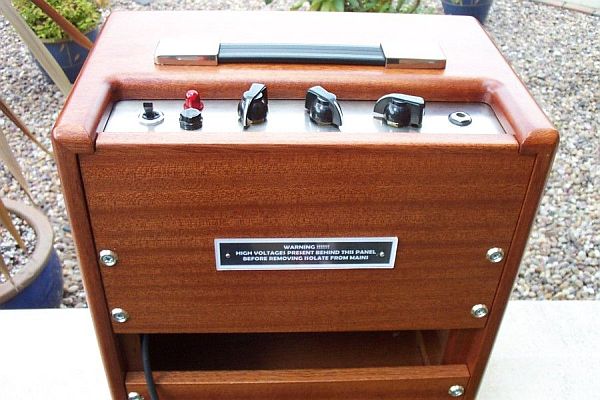 |
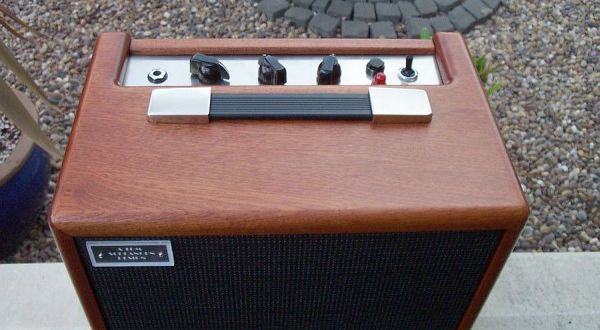
The controls - or - Less is more!
Left to right:
Mains switch, pilot lamp and fuse,
volume, bass and treble controls,
input jack. The treble control also acts
as a gain boost switch when being pulled.
Considering the control panel is only 9.5ins/240mm in length it would have been
difficult to squeeze in another knob. Besides, who needs a middle control?
Still the MoJo value of this classy line up is impressive:
Bulgin/Marshall switch, genuine neon pilot light, Vox/Hiwatt chicken heads,
Cliffe jacksocket, fuse holder. Well, we don't want to overdo it, and as can
be seen in the next picture an old style 1.25 ins fuse holder wouldn't fit.
One thing however. No matter how desirable chicken heads are, they're not
much good as pull switches.
|
 |
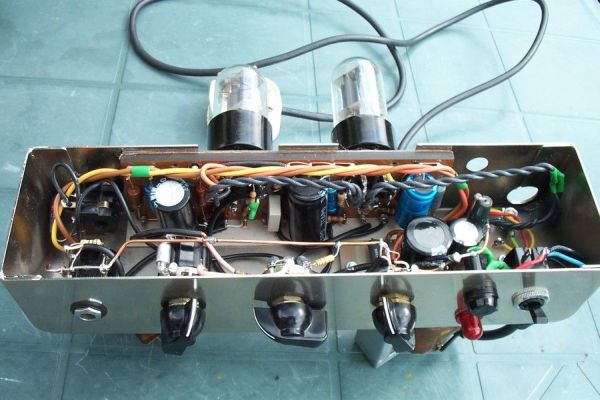
A view at the backside
Showing the ridiculously small chassis and speaker.
The cabinet was originately sized to take a 10ins speaker, but was found to work
as well with an 8ins one. This one, an old one from a radiogram, was later replaced
with a more modern one. Nothing special. In fact I tested the project with 3 alternative
speakers and the difference was hardly noticable.
The small overall dimentions of the chassis, 250mm x 70mm x 55mm, and the cutouts already
there, dictated the positions of the tubes. That, and the necessary control positions,
determined the component placing. Although the power supply filters (small circuit board L/H side)
are virtually touching the components on either side, there was very little hum.
Massively oversized resistors were used to keep the internal heat down.
|
 |
Electronics module
Easy to access, easy to service
Using a turret board and classical point-to-point wiring, the electronics module is
rather compact in size, yet still easy to service.
|
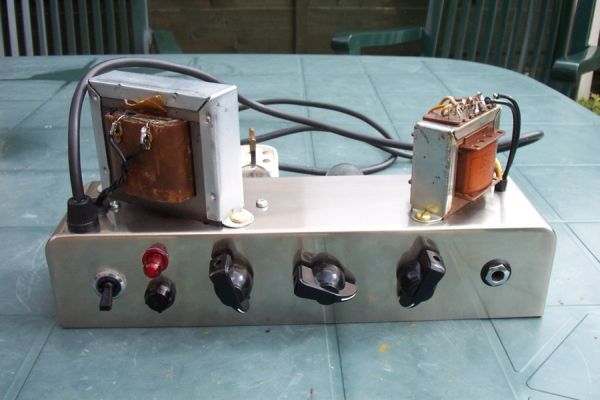 |
Electronics module
A view at the transformers
The transformers are arranged at a right angle to reduce coupling and hum. Also, this arrangement allows
for a much closer fit to the speaker, greatly reducing the depth of the cabinet.
|
|
|